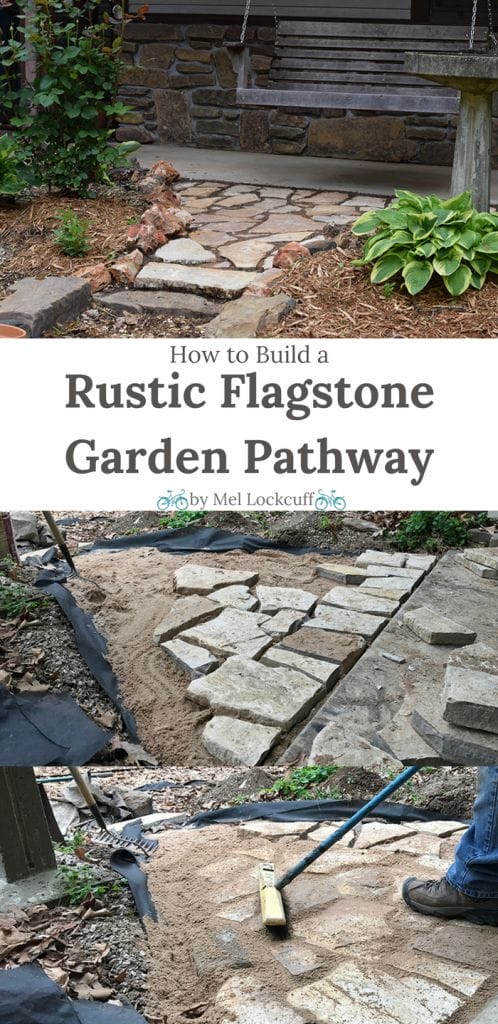
Last year we started a huge front yard renovation. We needed to divert water away from our house when it rains, something I’m so glad we did, especially in light of all the storms and flooding our area has experienced this spring. Part of that renovation, though, included a flagstone garden pathway leading up to our porch swing.

When I envisioned this pathway, I’d originally planned to use brick. But brick just wouldn’t have paired well with all of the stone already decorating our home. So, after a trip to the hardware store/gardening center and much research, we decided to go with flagstone for the following reasons:
1) It was more affordable.
2) It could be broken up into multiple smaller to medium sized pieces to create the design we wanted.
3) It had a more natural, rustic look.
If you’re looking to build your own flagstone path, you’ll need a few supplies.
Supplies You’ll Need for a Flagstone Garden Pathway
- Shovel
- Garden rake
- Weed barrier landscape fabric
- Carpenter’s knife
- Flagstone
- Sledgehammer
- Sand
- Soil
- Push broom
- Rocks for border
Instructions for Building a Flagstone Garden Pathway
The first step is to measure out the space for your pathway. Ours was a rather small space leading up to our porch swing from our stone walkway.
Once you have your space marked off, it’s time to start digging. You’ll want to dig down as deep as you need the path to be, in order for it to be at the level you want it to be, considering what you already have on either side of the path. We made our path a bit lower than the flowerbeds on each side of it. So we dug down about a foot and removed soil. You’ll also want to remove any rocks or other “interesting” things you may find buried in your garden area. I can’t tell you how many pieces of rebar we’ve found lurking in this area of our garden.
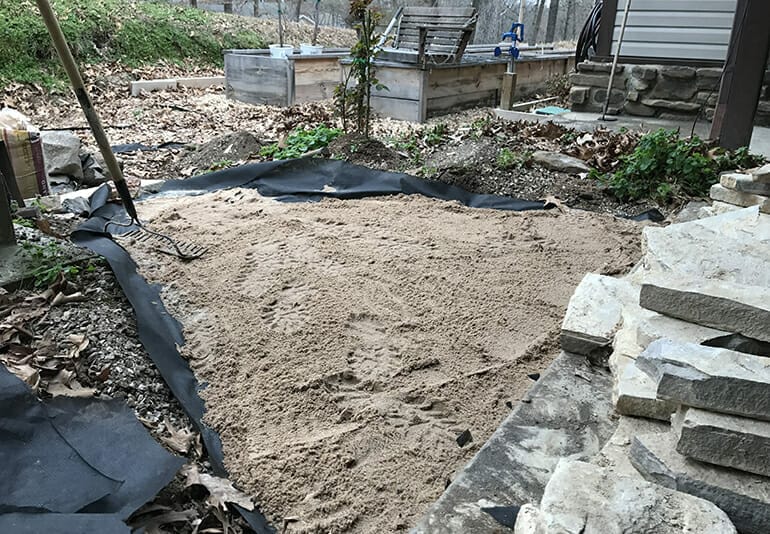
Once you’ve dug out your path, it’s very important to level out the entire area. Use a garden rake or a tamper to do this. Then when you have it leveled, put a layer of weed barrier down; it will likely overlap the sides, and that’s ok because you’ll trim off the edges a bit later in the process. On top of that weed barrier, lay down 2 to 3 inches of sand, and level it out completely.

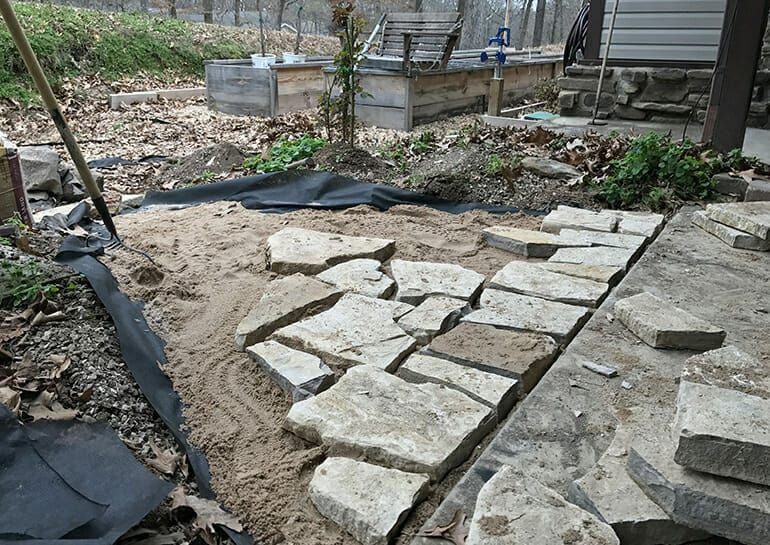
Once you have a level layer of sand, you can begin placing stones. Flagstone is nice because you can use a sledgehammer to break it up into smaller pieces. This gives a more aesthetic feel to the walkway, rather than having just a few huge stone slabs next to each other. As you place each stone, you’ll again be working to make sure each piece is level with the others, shifting stones and sand as you go. Make sure you leave at least a good inch of space between each stone.

When all your stones have been placed, and you’re happy with the look, you can fill in the gaps between stones and on the edges with sand and/or soil. We used sand first and then a little bit of soil. Use your push broom to brush sand into all the cracks and crevices. (Just a note: The sand will likely track (just a warning), so a top layer of soil helps to keep it in place. I know there’s a possibility that grass could grow up between my stones, but I’m ok with that. If you don’t want grass at all, don’t use soil.)

Finishing your Project
It can take a couple of weeks for your walkway to firmly set in place. Spraying your walkway with a water hose helps to compact the sand and soil down between the stones. After doing that, you may need to add another layer of sand and/or soil using your push broom to do so.
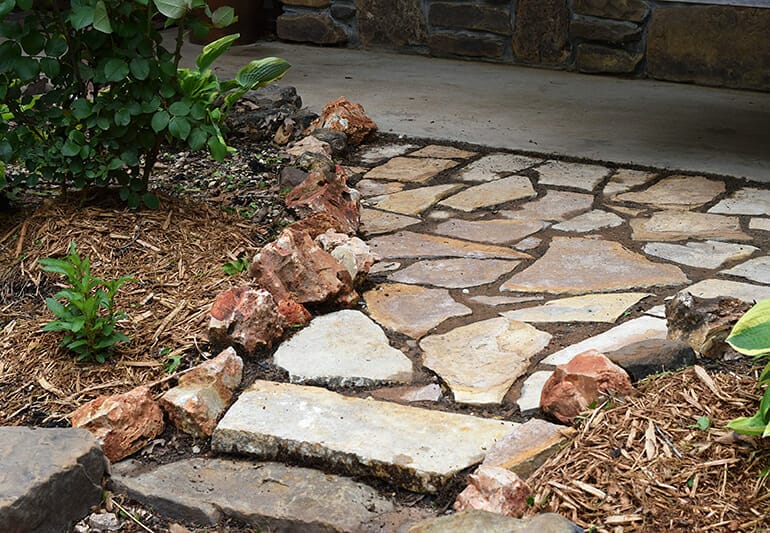
Finishing your walkway includes trimming any overhanging edges of the weed barrier and possibly giving it a border. We have so many rocks around our place; we decided to build a rock border all along the edge.

I love the rustic feel of the stone, and now we actually have a place to sit on our porch swing without worrying about getting on a snake.
However you choose to build your own garden path, we wish you the best and hope you’ve found this tutorial to be helpful. Happy building!

